One day I was sitting in my car and I noticed the fuel gauge oscillating back and forth.
Shortly after that, it started telling me that I was out of gas, or much lower
that it should have been. I read on Rob's
Audi World that it is a common problem for a wire to become frayed or broken and
interfere with the proper operation of the float bar on the fuel gauge sending unit.
So I decided to dive in and try to fix it myself. Here are some pictures I took and
advice I have to give. Do this outside on a sunny day so the gas fumes do not build
up and the sun will quickly vaporize the evidence of your chemical spills. Also,
gasoline vapors are heavier than air, so keep your head high and you'll avoid most
of the fumes. Finally, please read the entire procedure before attempting this repair.
Step 1:
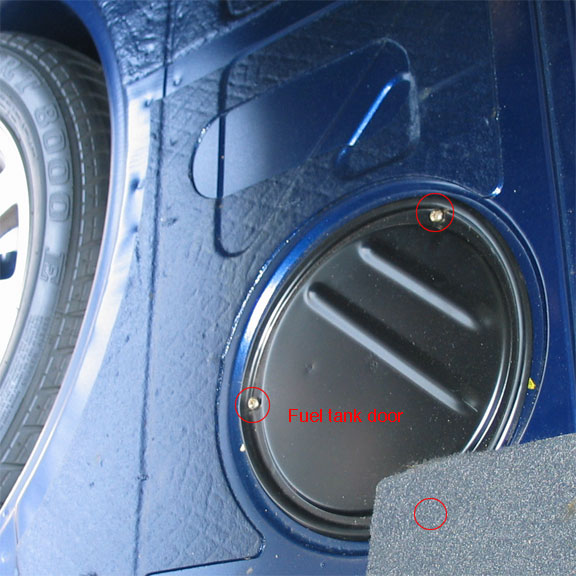
Remove the three philips screws in the fuel door. This is located in your trunk under
the carpet next to the spare tire.
Step 2:
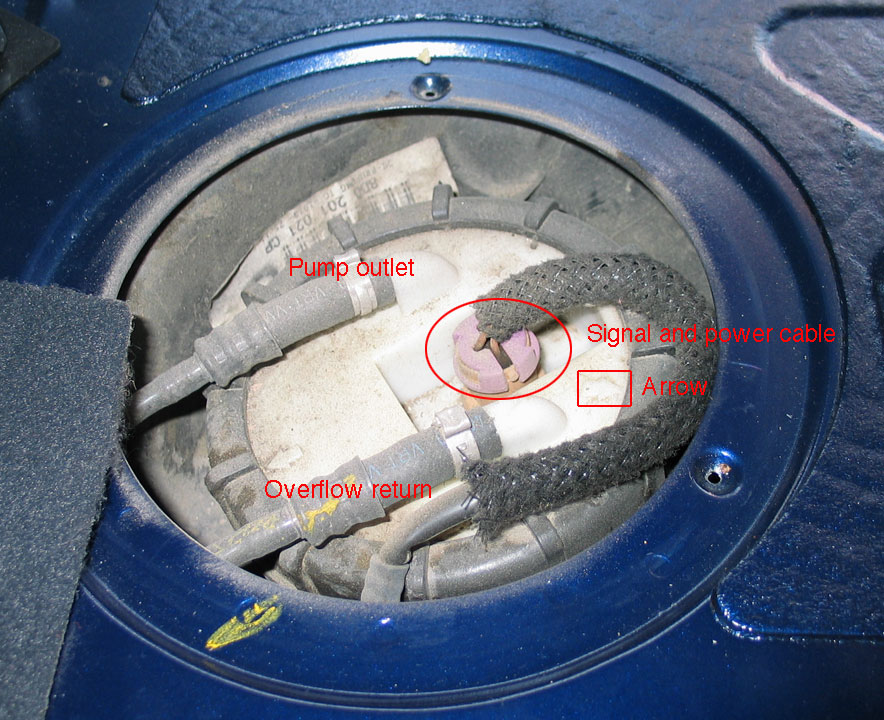
The area under this door is exposed to the outside world and will be very very dirty.
Well, that is until you spray gasoline everywhere, but that comes later. The first
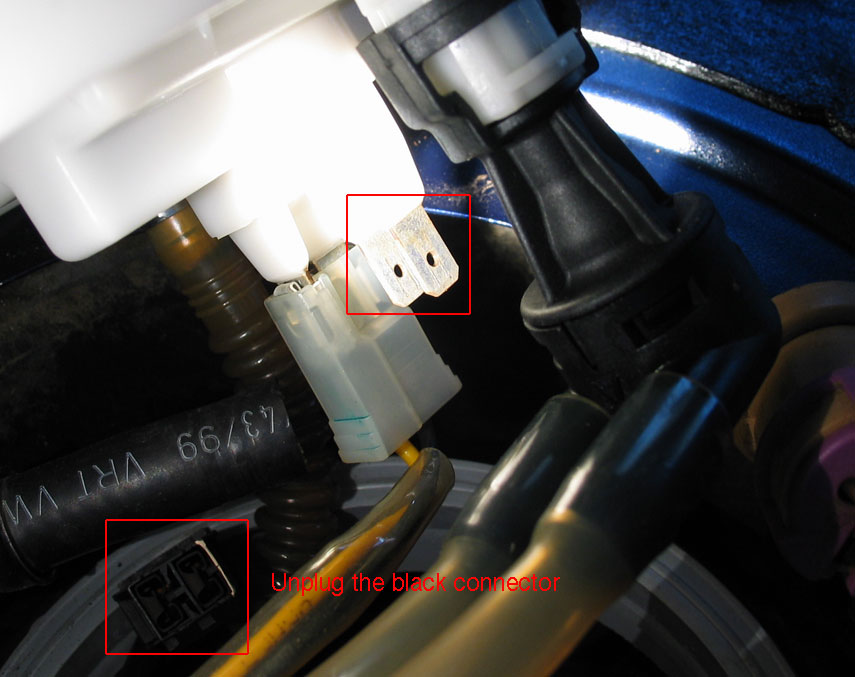
step is to remove the electrical cable connection. This provides power to the pump
and pins 2 and 3 are connected to the sending unit. Next remove the crappy Audi
hose clamps on both hoses. You should buy some 5/8" screw type clamps to replace them
with as they are not worth trying to save. The hose with blue lettering is the fuel
return hose. Remove it first. Expect the hose to put up one hell of a fight. I
just grabbed and twisted the metal part of the hose with my pliers to work it loose.
A few drops of gasoline may leak out of here. The hose with white lettering is the
fuel pump outlet. This hose is pressurized even when the system is off. Because of this
simple fact, the hose will shoot off the nipple with only the slightest tug, squirting
roughly 2 cups of gasoline everywhere. You can try to plug it with something,
but that won't help you when it's time to put it back on. I tried to catch it in my gas can,
but gasoline doesn't flow uphill and the hose is too short to get it above almost
any container. Any liquids spilled into the access door opening will drain out
on the ground. Clean up your mess and remove as much dirt as you can.
Step 3:
The large black plastic ring you can see in the above picture needs to be unscrewed.
It is on incredibly tightly. You can get it off using an enormous pipe wrench,
or you can use a great big flat blade screwdriver and a 3 pound sledgehammer to
turn the nut loose. BTW: loosen is counter clock wise. BTW2: Did I mention this
thing is tight? Don't get any ideas about tapping your screwdriver with a pair of
pliers. This nut is FREAKIN' TIGHT! You will need to hammer the crap out of it until
it breaks loose, and maybe even a lot more after that. While you are here, make note
of the arrow on the white porthole plug. Make a small mark on the metal it points at to aid alignment
during reinstallation. Lift the port hole cover. This is what you should see:
Do be careful not to drop anything in there that could contaminate your gas.
Step 4:
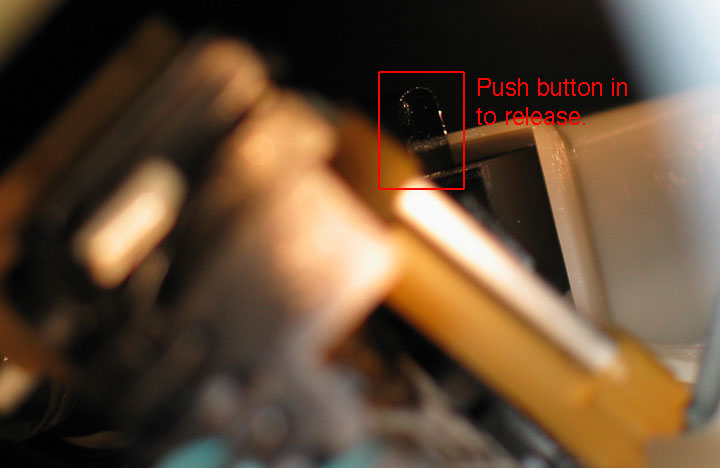
On the base of the sending unit, there is a large black plastic button. You
must push this button in order to remove the sender and float assembly. I did this
when my gas tank was almost completely empty (which can be hard to do if the gauge
is malfunctioning.) If you tank is not empty, some or all of what you see here may be
submerged in gasoline. Consider siphoning most of your gasoline out.
Gasoline will dry your skin out pretty bad, but on the grand
scale of things, it's really not all that bad for you externally. Just make sure you
wash thoroughly before rubbing your eyes, picking your nose, or eating your boogers.
You might also want to apply some lotion afterwards. A bright compact flashlight like my
Streamlight Stinger
can make your life much easier. Those wussy LED flashlights aren't even in the same league
as this baby. Lift the sender out being careful not to bang the float on anything.
Step 5:
On the bottom of the white porthole plug are two electrical connectors. The white one
goes to the fuel pump, and the black one goes to the sending unit. Unplug the black one.
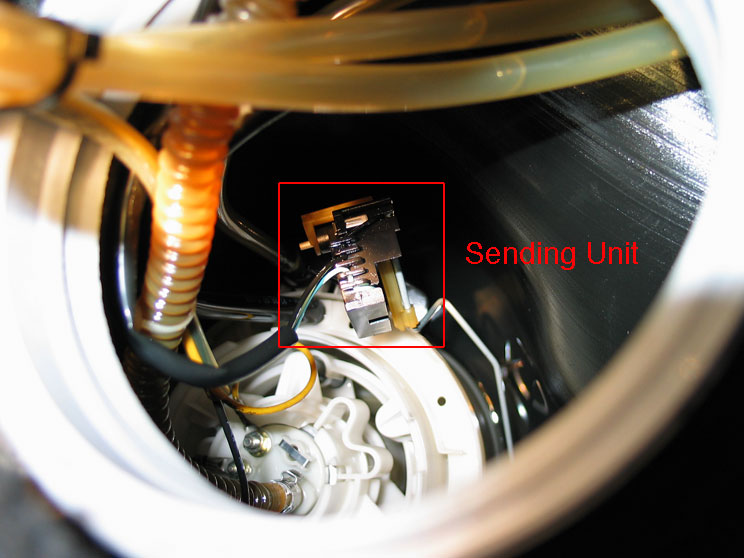
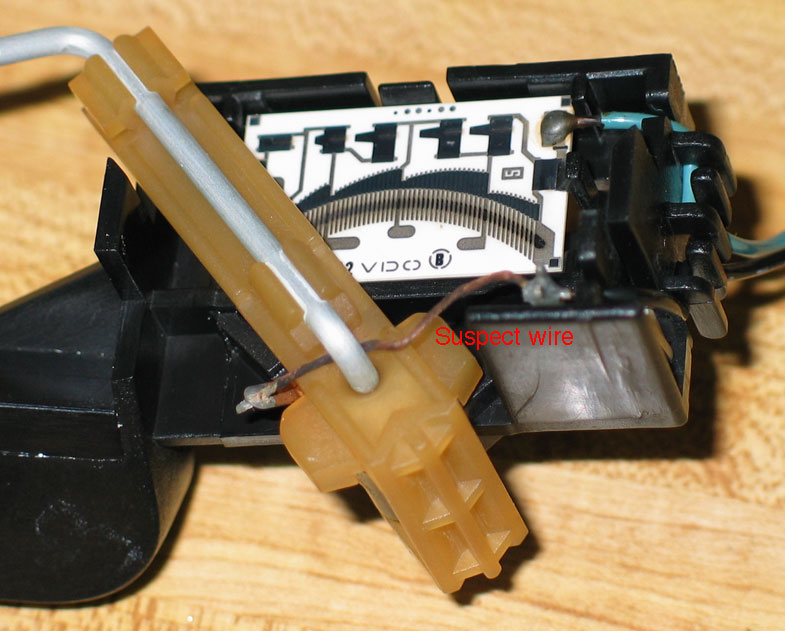
This is the sending unit. The wire marked is known to fray and break, and thus needing
replacement. You can unsolder it at both ends and replace it with a 26-30 gauge teflon insulated
wire. However, as you can see, mine is just fine. Also, there is no need to run it under the
bail as shown above. I have no idea what possessed some engineer at Audi to do that.
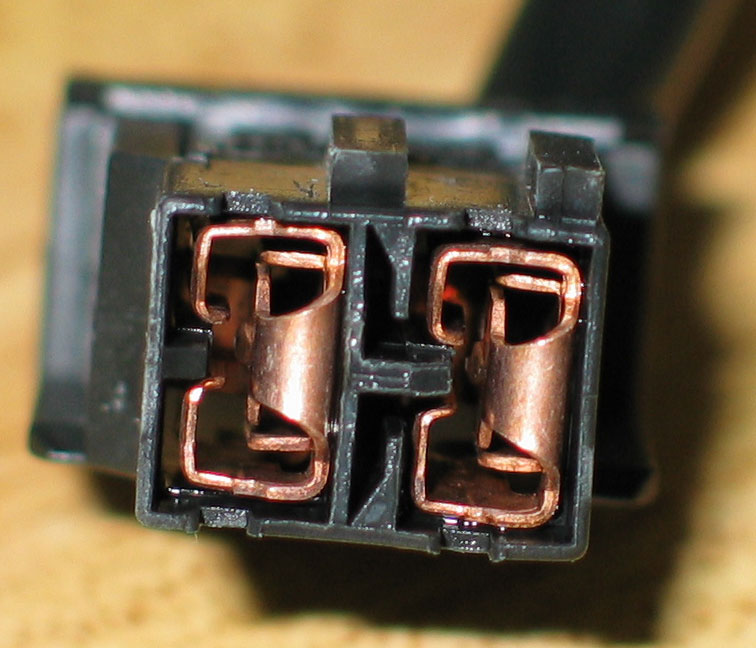
Hrmmm, time to read the directions. The shop manual says that the sending unit is just
a variable resistor that should read 280 ohms at empty and 40 ohms at full. When I tried
to measure it I found the copper terminals in the connector were black. Ack! My meter
really had a hard time getting a stable reading. I scraped a little off with my fingernail,
and then it read perfectly. So it needed cleaning eh? I went after it with an old toothbrush,
but that really didn't make a dent in it. So I put a little baking soda toothpaste on the
brush and went to town. Now it looks like this. The poor contact is the reason why my
fuel gauge was often reading low or unstable.
When putting the system back together, make sure that the sender is completely free
of water or dirt, and follow the directions above in reverse. Since it is just a resistor,
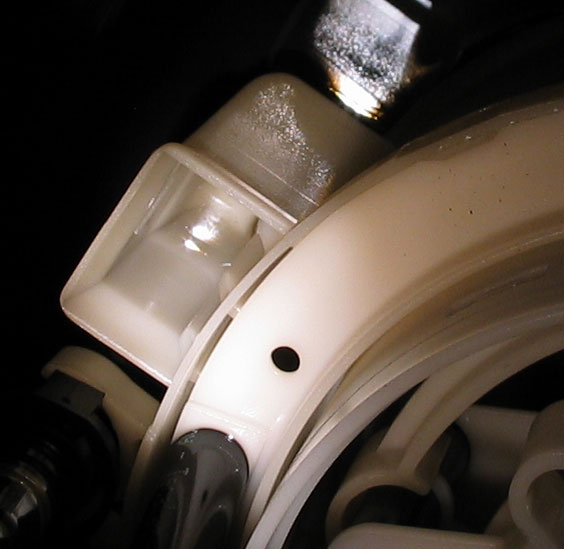
it does not matter which way the plug goes back on. If you are having trouble
getting the sending unit back in it's proper place, look below for this socket on the rear
of the fuel pump. Push it down firmly until it snaps in place.
Make extra certain that you tighten the big black ring super tightly. Its important to get
a good seal or gas vapors might leak out. Expect to do more hammering again. When it's fully
seated, it will sit tightly against the white plastic porthole cover. If you can slip anything
under the nut, it's not tight. Also, it's very easy to cross thread the nut. To avoid this,
turn it CCW, pushing down gently, until the threads drop into proper alignment. Then tighten
clockwise.
No pages or images anywhere within my site may be linked to on another web page without my express written consent.